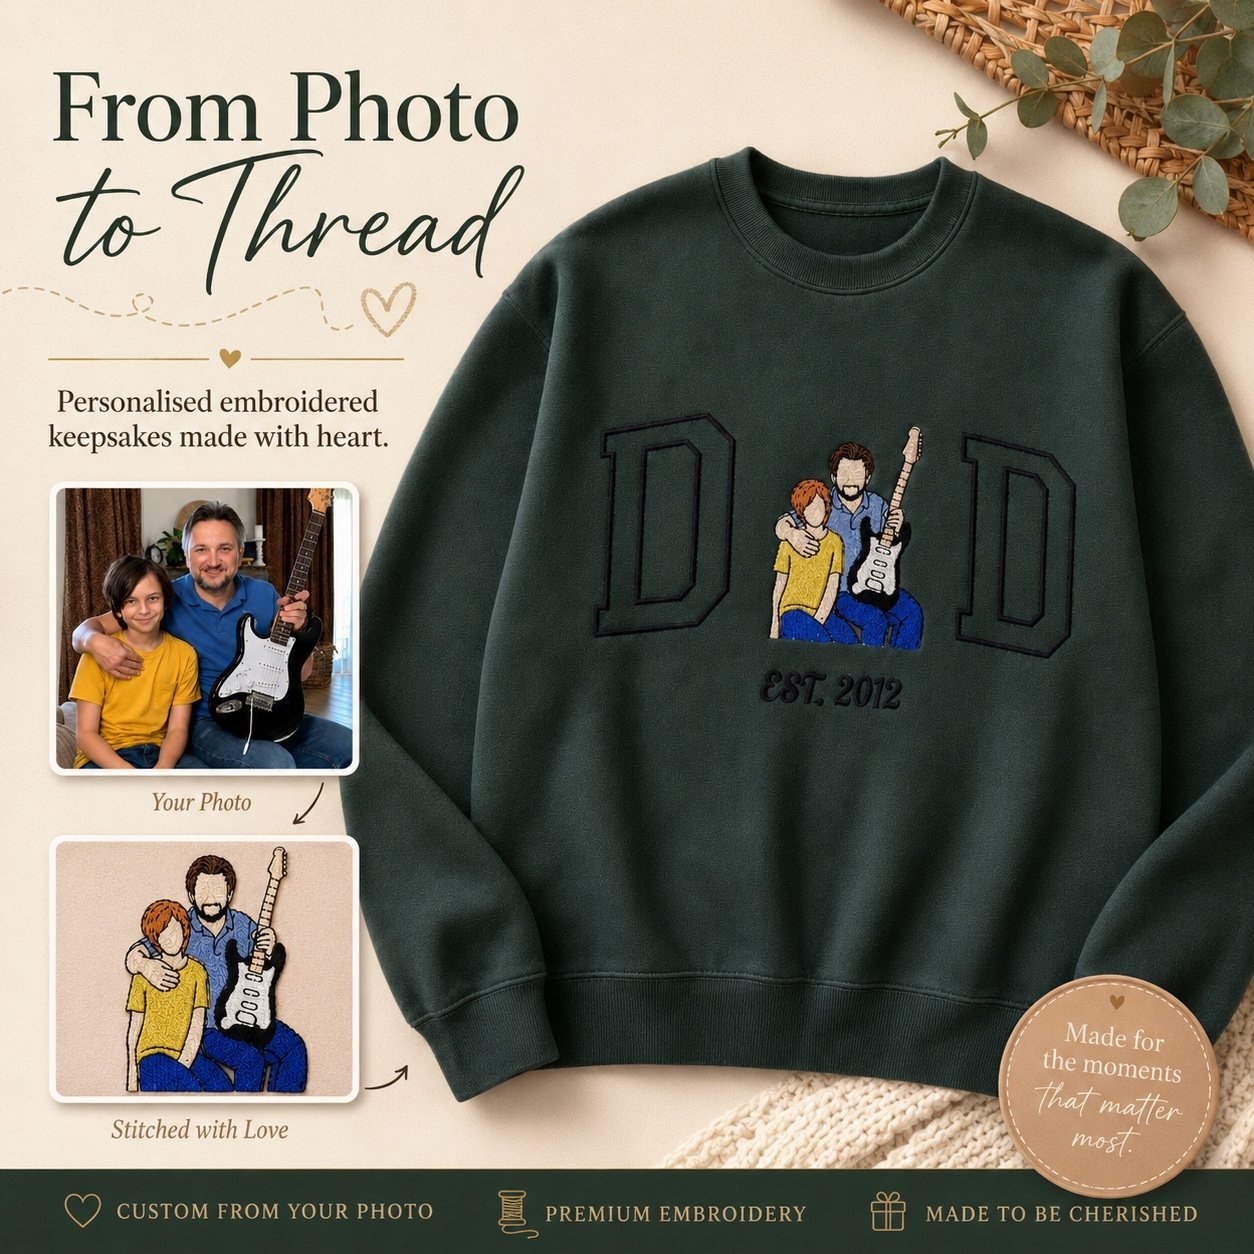
Photo embroidery transforms a meaningful photograph into a personalised stitched design.
A family portrait, wedding photo, baby picture or special memory can be simplified, digitised and embroidered onto a sweatshirt, hoodie, T-shirt or another suitable item.
Unlike a printed photograph, embroidery creates a textured, long-lasting keepsake made from thread.
What Is Photo Embroidery?
Photo embroidery is the process of converting a photograph into a stitch-ready embroidery design.
The original image cannot be embroidered exactly like a printed photo. Instead, the most important features are carefully selected and recreated using lines, shapes and thread.
This may include:
- Facial outlines
- Hairstyles
- Clothing details
- Hands and body position
- Meaningful objects
- Simple background elements
- Names, dates or short wording
The finished design captures the feeling and composition of the photograph while remaining suitable for embroidery.
Which Photos Work Best?
Clear, well-lit photographs usually create the strongest embroidery designs.
The best photos have:
- Good natural lighting
- Clearly visible faces
- A simple or uncluttered background
- Strong contrast between people and clothing
- A clear body position
- Minimal blur
- Important details that are not hidden
Photos taken in daylight often work especially well.
Very dark, blurry or heavily filtered photographs may need to be simplified more than a clear original image.
Can More Than One Person Be Included?
Yes. Photo embroidery can include one person, a couple or a family group.
The number of people affects the recommended embroidery size and level of detail.
A small left-chest design is usually best for one simple portrait. Larger centre-chest or back designs allow more room for couples, families and additional details.
For photographs with several people, a larger design usually creates a clearer and more balanced result.
How Is the Photograph Prepared?
The first step is reviewing the photograph and deciding which elements should be included.
Unnecessary background details may be removed so the main subjects remain the focus.
The image is then simplified into an artwork suitable for embroidery. Fine photographic details, shadows and skin tones may be reduced or translated into clean stitched lines.
This helps the design remain recognisable without becoming overcrowded.
What Is Embroidery Digitising?
Embroidery digitising is the process of converting artwork into instructions that an embroidery machine can read.
The digitised file controls:
- Stitch direction
- Stitch type
- Stitch density
- Thread colour changes
- Underlay
- Stitch order
- Entry and exit points
Digitising is not the same as simply uploading a photograph to the embroidery machine.
Each design must be planned so the stitches sit correctly on the selected garment and the finished embroidery remains stable and clear.
Will I Receive a Design Preview?
Yes. Before embroidery begins, you will receive a design preview for approval.
The preview allows you to check:
- The overall layout
- The people included
- Placement
- Names or dates
- Approximate thread colours
- Important personal details
Small changes can be discussed before the design is stitched.
Embroidery will begin only after the design has been approved.
Choosing the Right Embroidery Style
Photo embroidery can be created in different visual styles.
Outline Embroidery
Outline embroidery uses clean stitched lines to show the main features of the photograph.
It creates a modern and minimalist result and works especially well on sweatshirts, hoodies and T-shirts.
Detailed Line Art
Detailed line art includes more clothing, hair and facial details while still keeping the design suitable for thread.
This style usually requires a larger embroidery area.
Simplified Portrait Embroidery
A simplified portrait focuses on the most recognisable details without trying to reproduce every part of the photograph.
This creates a balanced design that remains clear when stitched.
Choosing Thread Colours
Thread colours are selected to suit both the photograph and the garment.
Some customers prefer colours that closely reflect the original clothing, while others choose a neutral monochrome design.
Popular options include:
- Black line embroidery
- Cream or beige thread
- Brown and neutral tones
- Soft muted colours
- Selected colours from the original photograph
Good contrast is important. Dark embroidery usually shows best on a light garment, while lighter thread may work better on black or dark fabric.
A preview is provided before embroidery so the proposed colour combination can be reviewed.
Choosing the Right Garment
Photo embroidery can be added to:
- Crewneck sweatshirts
- Hoodies
- T-shirts
- Customer-supplied garments
- Other suitable textile items
The fabric must be stable enough to support the design.
Sweatshirts and hoodies are often ideal because their fabric can hold larger and more detailed embroidery. Lightweight T-shirts may require a smaller or simpler design.
Choosing the Best Placement
The best placement depends on the number of people and the amount of detail.
Left Chest
Best for:
- One person
- A small simple portrait
- Minimal line art
- A subtle personalised detail
Centre Chest
Best for:
- Couples
- Two or three people
- Medium-sized family designs
- Designs with names or dates
Back
Best for:
- Larger family portraits
- Detailed compositions
- Several people
- Designs requiring extra space
The final placement should complement the garment and allow the photograph to remain clear.
How Large Should the Embroidery Be?
The recommended size depends on the complexity of the photograph.
Typical options may include:
- Small — up to 12 cm for one simple person
- Medium — up to 16 cm for two or three people
- Large — up to 20 cm for a family design
- Extra large — quoted individually
Very detailed photographs usually need a larger embroidery size.
Trying to fit too many small details into a small area can make the design difficult to read.
How Long Does the Process Take?
Creating photo embroidery involves several stages:
- Reviewing the photograph
- Preparing the artwork
- Digitising the design
- Creating the preview
- Receiving approval
- Testing and embroidering
- Finishing and packing
Standard production time may be up to 15 business days after approval and payment.
Rush orders may be possible depending on the design and current workload.
A Personalised Keepsake Made from Your Story
Photo embroidery is a meaningful way to preserve a special moment.
It can be created from:
- A wedding photograph
- A family portrait
- A baby photo
- A picture of grandparents
- A parent and child
- A memorial photograph
- A favourite holiday memory
- A meaningful celebration
The result is more than a decorated garment. It is a wearable keepsake created from a moment that matters to you.
Handmade and Embroidered in Australia
Each Monomi photo embroidery order is prepared individually in Australia.
Every photograph is reviewed, simplified and converted into a custom design before stitching begins.
Because every photograph and story is different, each finished piece is unique.
Ready to Turn Your Photo into Thread?
Choose your favourite photograph, garment style, embroidery size and placement.
Explore our From Photo to Thread service and create a personalised embroidered keepsake from a memory you love.